How To Configure My External Hard Drive For Mac
In this video from AppleGenius0921 he shows us how to connect and set up a Rocport 9CX external hard drive to your Mac. You can connect with 800 or 400 firewire. Take the 800 firewire cord and connect it from the hard drive to the Mac firewire port.
If you can't boot your Mac If your Mac is not working, the serial number is printed on the computer casing but the location varies. Here are the main locations of serial numbers on Apple computers. • Unibody MacBook Pro - Laser etched onto the base. • MacBook, Early MacBook Pro, PowerBook G4 - Inside the main battery bay. Remove battery to locate.
• iBook (White) - Under the keyboard. To lift keyboard, pull back on the release tabs between the F-keys. • Intel iMac, iMac G5 - Underside of the foot/stand.
• iMac G4, iMac G3 - Underside of the iMac. • Mac mini - On the underside of the Mac mini. • Mac Pro 2006-2012 - On rear of machine near graphics card ports. • PowerMac G5 - On lower chassis under side panel. To remove side panel, lift lever on rear of Mac. • PowerMac G3, PowerMac G4 - Label on the back of the Mac. More detailed information on finding your serial number is available.
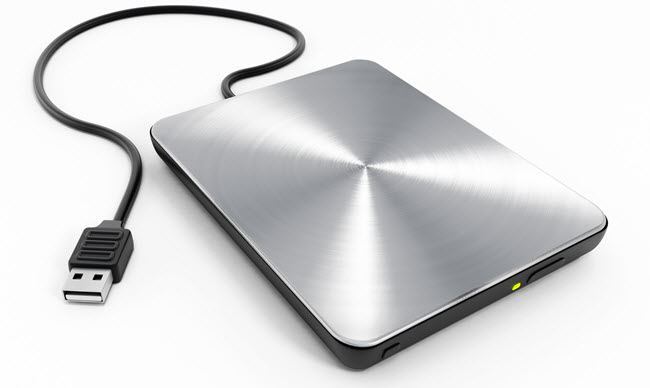
• Choose Upgrades by Model Identifier. Your Mac's Model Identifier can be found in System Profiler. You can use the drop-down menus above to be taken to a page that displays upgrades specifically for your exact model. This tool is also available on its, with a list of all Model IDs. Mac Hard Drive Setup Guide All our hard drives come blank and unformatted, or in the case of some external hard drives are formatted in Windows specific formats and should be reformatted before use on a Mac. This guide aims to show you how to prepare your disk for use with your Apple system.
Look no further! Here are top 6 free PDF editor Mac tools to edit PDF files with ease. Mac users will not need to worry about how to edit PDF files on Mac for free. Though many free PDF editor Mac software come with limited features and they cannot fully edit PDF files or documents on Mac. PDF Expert – Best Free PDF Editor for Mac If you want a good PDF editor for your iPhone and iPad then Good Reader does a good job, however it cannot fill or edit the forms. For this purpose, you can use the PDF Expert which is slightly more expensive than Good Reader. Top 3 Free PDF Editor Apps for Mac OS X – PDF Editor # 1 – Preview (In-built into Mac OS X) Editing PDF Files with Preview in Mac OS X. What’s more better than using a default app inbuilt into your Mac OS itself to edit PDF files. Yes, Preview – the default PDF viewer app of Mac OS X has an inbuilt feature by virtue of which you can easily edit the PDF files. Free app for editing pdf mac os.
It does not cover the physical installation of the hard drive, but rather the steps necessary to prepare an installed drive for use. This guide applies to all internal hard drives, both for laptops and desktops, and both SATA or ATA drives. It is also relevant for setting up external hard drives, since the procedure for formating the drives is the same. The guide is divided into two parts, firstly for Mac OSX, and secondly for OS 9 and below.
MacOS X (all versions) If Adding as main drive (i.e. No others) • Install the hard drive (for IDE drives, normally set drive to master).
• Check connectivity and turn on machine as normal. • Boot into Recovery Mode (hold Command-R on startup) in machines that have that facility (roughly 2010 and later models). Otherwise insert your Mac OS X Bootable DVD, and boot from it (hold 'c' on startup). • In OSX 10.4 and later go to the Utilities menue and choose Disk Utility • In 10.3 and earlier go to the File Menu and select 'Open disk utility'. • You will see a window appear with the hard drive on the left. • Select the new drive (should be only one). • Double check this drive does not contain any of your important data.

• In the right hand window you will see and option for 'Erase' click this button (see picture below). • You can partition your drive from within Disk Utility also. • Once the drive has formatted, if you are booting from 10.3 or earlier, restart machine (this step is important). • Go through the normal OS install procedure, or restore from your backup. If adding as an extra (additional) drive • Install hard drive (for IDE drives, normally set drive to slave).
• Check connectivity and turn on machine the as normal. • Once booted into OS X, navigate to your (existing) hard drive.
• Open the hard drive and navigate to the Applications Folder. • Navigate to the Utilities folder. • Open / Run Disk Utility. • You will see a window appear with the hard drive on the left. • Select the new drive (this is the one without a volume attached to it).
• In the right hand window you will see and option for 'Erase' (see picture below). • Double check this is the right drive, then click 'Erase'.
• You may partition the drive from this screen also. • The drive will then appear on the desktop and is ready to use. MacOS 9 and below If adding as an extra (additional) drive • Install the hard drive (for IDE drives, normally set the drive to slave). • Check connections and turn on the machine as normal. • Once the machine has booted, navigate to your hard drive. • Open the Applications folder (or 'Applications (OS 9)'). • Open the Utilities folder.
• Find and open the Drive Setup Folder. • Run / Open the Drive Setup program. • Select drive which says 'Not initialised'. • Click Initialise.
• Drive will now format, and appear on the desktop and is ready for use. If Adding as main drive (i.e. No other HDD present) • Install hard drive (for IDE drives, normally set the drive to master). • Check connections and turn on the machine. • Open CD tray and insert your system CD. • Restart machine with the reset button on front.