Insert Contectr Control Word For Mac
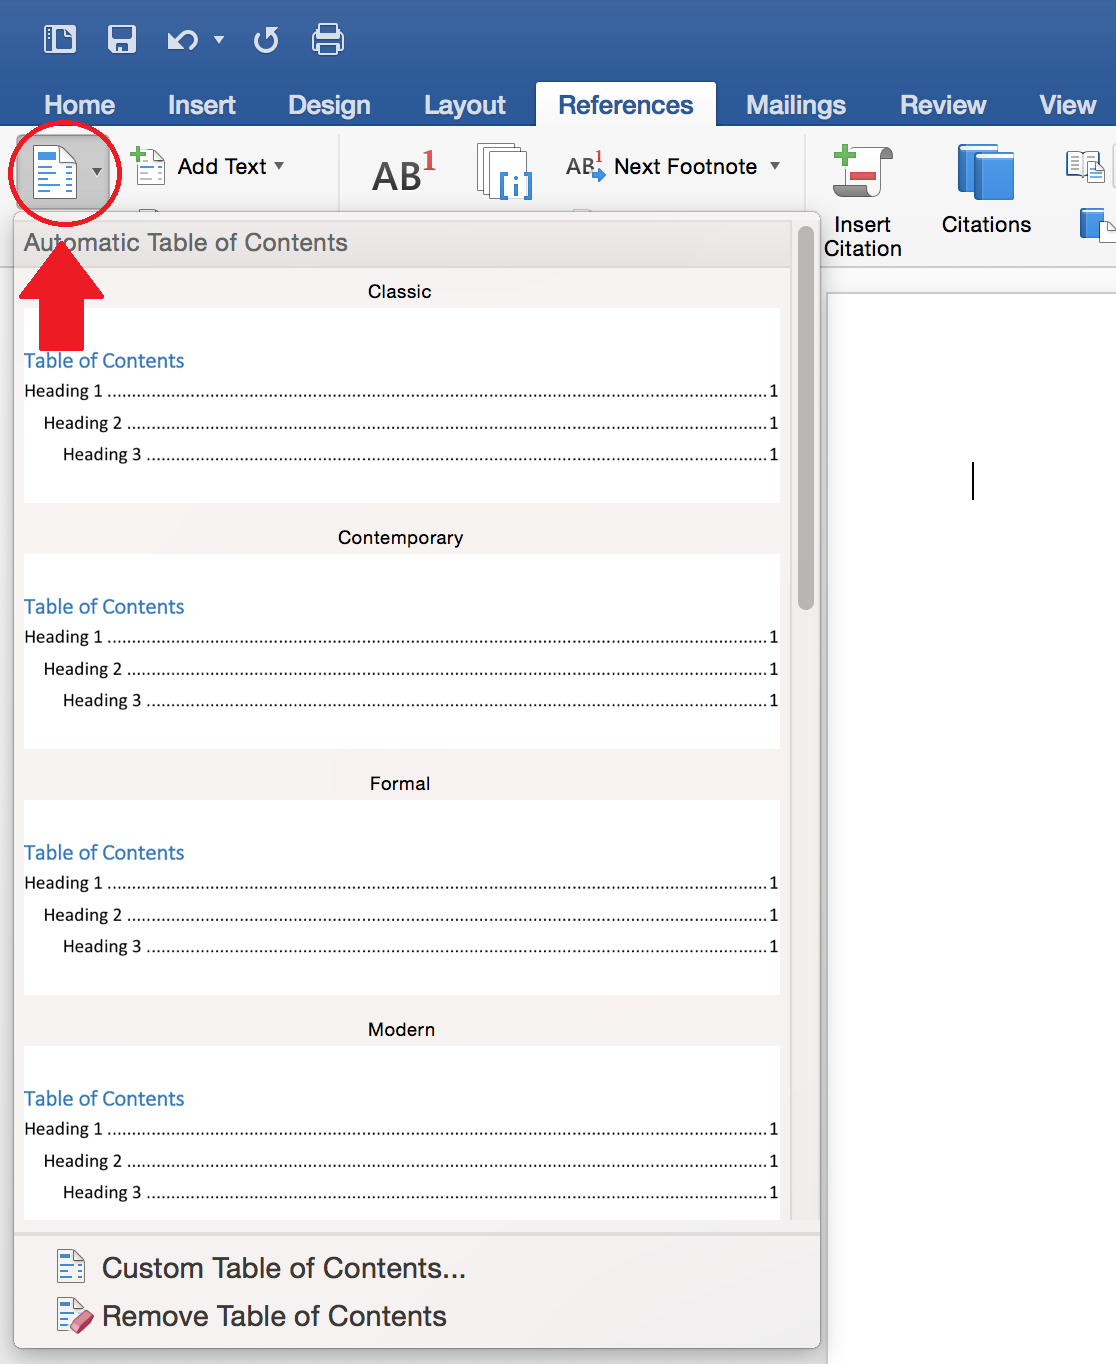
How to add check box with content control To activate the Developers tab and integrate the content control for the check boxes, we must navigate the Microsoft Office Word settings. Making a form in Word 2011 for Mac is as simple as choosing appropriate form controls from the Developer tab of the Ribbon in Office 2011 for Mac, placing them in your Word document, and then enabling your form by turning protection on. Sometimes you don’t need a text field for a response, and a check box is enough.

By default, there is no easy way of finding out which mode is currently active except by typing and seeing what happens. You can add an indicator to the status bar at the bottom of the Word window that both tells you which mode is currently active and allows you to quickly switch modes. We will show you multiple ways to switch modes and how turn on this indicator. The Insert mode is active by default, so we’ll show you how to turn on Overtype mode.
In Word, click the “File” tab. On the “Info” screen, click “Options” in the list of items on the left. The “Word Options” dialog box displays. Click “Advanced” in the list of items on the left. In the “Editing options” section, click the “Use overtype mode” check box so there is a check mark in it. NOTE: If you want to use the “Insert” key on the keyboard to quickly switch between the two modes, click the “Use the Insert key to control overtype mode” check box so there is a check mark in it. Click “OK” to close the “Word Options” dialog box.
To add an indicator for Insert/Overtype mode to the status bar, right-click on a blank spot on the status bar. A large list of items that can be added to the status bar displays on a popup menu. Items preceded by a check mark are currently displayed on the status bar; if there is no check mark to the left of an item, that item is not included on the status bar.
Select “Overtype” from the popup menu. An indicator immediately displays on the left side of the status bar, reading either “Insert” or “Overtype,” depending on which mode is active. In addition to the methods we previously mentioned for switching between the Insert and Overtype modes, you can also click on the indicator to switch modes. If you decide you don’t want the indicator visible on the status bar, you can easily disable it by right-clicking on the status bar and selecting “Overtype” from the popup menu again, removing the check mark from the item. If you have a smaller screen, you may not want the indicator to take up room on the status bar.
However, you may not know which mode is active until you start typing. How to work for mac.
You can use the Character Viewer to insert smileys, dingbats, and other symbols as you type. • Click the place in your document or message where you want the character to appear. • Press Control–Command–Space bar.
The Character Viewer pop-up window appears: • Use the search field at the top of the window, or click to expand the window and reveal more characters: • When you find the character that you want, click or double-click it to insert it into your text. In the app, you can also see the Character Viewer popup when you click in the lower-right corner. With macOS Sierra or later, emoji you send in Messages appear at the same size as the text they're part of.
If you just send a few emoji without any other text, the emoji appear three times larger. To type an accented or alternate version of a character, press and hold a key until its alternate characters appear. To choose one of the characters displayed, type the number that appears under the character, or click the character you want to use.